Looking back at Microsoft BlueHatIL 2023

In March 2023, I attended the sixth edition of BlueHatIL, a cybersecurity conference organized by Microsoft. The event is specifically focused on the Israel region and brings together researchers, experts, and professionals from the cybersecurity community to discuss the latest developments and challenges in the field of cybersecurity.

Before the event started, I visited the Microsoft Israel Development Center (ILDC) with some colleagues to meet with program managers of various security products from the Microsoft portfolio. The conversations were particularly valuable as we had the opportunity to directly speak with the developers of the security products and provide feedback. It became clear to me once again that Microsoft has a strong focus on the security of the services and solutions they offer. It is wonderful to see how dedicated everyone was and how Microsoft enables us to collaborate and make products even better together.

The name “BlueHat” is derived from the “Black Hat” and “White Hat” terms used in the cybersecurity community to describe malicious and ethical hackers, respectively. “Blue” in the name BlueHat refers to Microsoft.

During the conference, topics such as cloud security, zero-day vulnerabilities, threat detection and analysis, malware research, and more were discussed. One of the highlights was the keynote speech by David Weston, Vice President of Enterprise and OS Security at Microsoft. He spoke about the future of security in Windows and introduced some significant changes for the Windows OS, such as the integration of Rust in the Windows kernel.

Rust offers excellent performance and strong capabilities in terms of secure memory usage, providing opportunities to enhance activities related to system programming tasks, including the development of Windows operating systems and network services.

Additionally, David emphasized once again that “adminless” work is the future. Adminless work is a component of Microsoft’s “zero-trust” security model, where users are given the minimum level of access necessary to perform their tasks. This means that users do not have administrative rights on their local workstations. An IT administrator will perform administrative tasks when necessary.

There are several reasons why this is crucial. One of them is that the likelihood of attackers infiltrating a system is reduced when they don’t have administrator access. Furthermore, the organization gains more control over its data by restricting access to only those who need it. This way, organizations can better protect their data from unauthorized access. Another significant reason for not having administrative rights on workstations is that it reduces the risk of malware infections by limiting users’ ability to install software and make changes to their systems. It is less likely for malware to spread across a network if users don’t have administrative access.

Like David Weston says:

“Running as admin is like running with scissors”

Please find below the retrospective video for a glimpse of the atmosphere at BlueHatIL 2023.

Block downloads with Cloud App Security and Conditional Access

Microsoft Cloud App Security (MCAS) has the capability to monitor user activity, manage cloud applications, detect suspicious activity, discover shadow-IT and force security and compliance policies for Microsoft and non-Microsoft applications. In this blog post my focus is mainly on the policies to control data exfiltration from an IT-environment. It is described how to prevent downloading company data when working on unmanaged devices.

Of course, it is preferred that users work on managed, compliant devices at all times, enabling them to have full access to the company applications and Office365 functionalities. In this scenario a situation is described in which users work via non-compliant, unmanaged devices and as a result those users can only access Office 365 applications via a browser session, but downloads from OneDrive, SharePoint, Teams and downloading attachments from emails will be blocked. In this setup Cloud App Security and Conditional Access is used for configuring the policy that defines how to control browser sessions.

Pre-requisites

In order to configure MCAS make sure that the correct permissions and licenses are in place:

  • Global Administrator or a Security Administrator
  • Enterprise Mobility + Security E5

Connected Apps

First connect the application that requires configuration in order to get control, visibility and receive access to the investigate activities. Please follow the steps below to do so:

  • Access to the Cloud App Security portal goes through: https://portal.cloudappsecurity.com
  • From the settings menu open “App connectors” and via the blue plus icon, select the right application, in this case “Office 365“, see (figure 1)
  • Perform the steps in the wizard to connect the app successfully

Figure 1. App connectors from the MCAS dashboard.

Create Cloud App Security policies

Second, policies need to be created to control alerts and actions, in order to configure the blocked download policy. This can be done as follows:

On the left, click Control -> Policies (figure 2)

Figure 2. Create policies.

Click on Create policy -> Session Policy (session control applies to browser-based apps, figure 3)

Figure 3. Create Session Policy.

In the Create Session Policy window select the following settings as shown in figure 4:

  • Policy template: No Template
  • Policy name: Block browser download unmanaged devices
  • Description: (can leave blank)
  • Policy severity: Low
  • Category: DLP
  • Session control type: Control file download (with DLP)
  • Activity source: DeviceTagdoes not equalcompliantdomain joined
  • Actions: Block (feel free to type a customize message)

If desired, one can also send an alert via email or Flow when the policy is active. Don’t forget to save the policy.

Figure 4. Create cloud app security session policy.

Create Conditional Access policies

Third a Conditional Access policy can be determined in Intune indicating to which users the policy must be applied and under which conditions.

Figure 5. Create Conditional Access Policy in Intune.

Give the policy a name for example “Block browser download unmanaged devices”. Next, assign the users and/or groups to which the policy applies, as shown in figure 6.

Figure 6. Assign users and/or groups to the policy.

Now the Cloud apps and actions can be configured. In this case the policy should be active on Office 365 Exchange Online and Office 365 SharePoint Online (figure 7).

Figure 7. Configure cloud apps or actions.

Note: When SharePoint Online is chosen in the Conditional Access policy, this not only applies to SharePoint Online and OneDrive, but also to Teams, Plans, Delve, MyAnalytics and Newsfeed.

Under Conditions select at Device Platform -> Any Device (figure 8) and under Locations -> Any location (figure 9). In the Device state under Include -> select All device state and check the following boxes under Exclude -> Device Hybrid Azure AD joined, and Device marked as compliant (figure 10 & 11).

Figure 8. Configure conditions.

Figure 9. Configure locations.

Figure 10. Configure device state (include).

Figure 11. Configure device state (exclude).

As described, a Cloud App Security policy is now configured for blocking downloads from browser sessions on unmanaged devices. Next, the Session controls will be configured, so Conditional Access is aware of the policy. To do so, check the box Use Conditional Access App Control and select Use custom policy… (figure 12).

Figure 12. Configure session policy.

Enable and save the policy!

End-user Experience

When a user opens https://portal.office.com from an unmanaged device and then opens Outlook, a notification is received by the user that Exchange Online is monitored (figure 13). When the user chooses to continue, the mailbox opens, and if the user subsequently wants to download attachments from emails in Outlook, a notification will be shown that the device is not secure as displayed in figure 14. The same will be observed when downloading documents from OneDrive (figure 15 & 16).

Figure 13. Notification that access to Microsoft Exchange Online is monitored.

Figure 14. User notification when downloading attachments in OWA.

Figure 15. Notification that access to Microsoft OneDrive for Business is monitored.

Figure 16. User notification when downloading attachments from OneDrive.

As soon as users go to SharePoint Online, OneDrive, Teams, Plans, Delve, MyAnalytics and Newsfeed via an unmanaged device, traffic is redirected and monitored via Cloud App Security. Subsequently, alerts appear in the Cloud App Security portal under the Alerts pane if an event occurs, so that an investigation can be started as displayed in figure 17.

Figure 17. Cloud App Security – Alerts.

Good luck securing company data!

Unable to Proceed error during upgrade Operations Manager 2012R2

During the upgrade of Operations Manager 2012R2 it is possible that you encounter some problems. For example, starting the upgrade process for Operations Manager 2012 R2 the following error is shown in some cases: “Setup is unable to proceed with installation for the following reason: “Setup could not detect the current Data Warehouse scenario. Please ensure That the SQL Server service for the Data Warehouse is running, and the current User has permission to access the Data Warehouse” (Figure 1).


Figure 1. Operations Manager 2012R2 upgrade error: Unable to Proceed.

In such a case the names of the Data Warehouse Database and the Data Warehouse Database Server are missing in the registry and therefore the setup cannot be continued. To check this go to “HKEY_LOCAL_MACHINE \ SOFTWARE \ Microsoft \ Microsoft Operations Manager \ 3.0 \ Setup” to determine if the values of the “DataWarehouseDBName” and “DataWarehouseDBServerName” are present. If not, please add the Data Warehouse Database Name and Data Warehouse Server name as shown in Figure 2. Subsequently, restart the Operations Manager 2012R2 installation. The error should be resolved.

Figure 2: Data Warehouse Database name and the Data Warehouse Database Server name in registry.

SCOM License: Requested registry access is not allowed

After installing System Center Operations Manager (SCOM) 2012 R2 it is necessary to enter the product key. This can be done by the Operations Manager Shell, but if the command Set-SCOMLicense -ProductId <Product Key> was entered the message: set-scomlicense: Requested registry access is not allowed may appear (Figure 1).

Figure 1. SCOM PowerShell License key error


To rapidly add the Operations Manager product key the following steps should be taken:

Solution:

  1. Open the standard Windows PowerShell console as an Administrator.
  2. Type the following command: Import-Module OperationsManager
  3. Enter the following command: Set-SCOMLicense -ProductId <Product Key>

This way you can quickly activate Operations Manager without editing the registry settings. Don’t forget to restart the Operations Manager server.

I found this solution on Michael Skov’s his blog, which can be found here. Many thanks Michael for sharing this solution.

Creating Rules in Operations Manager 2012 R2

In this post I will describe the necessary steps that must be followed in order to create a rule targeted against a group in Operations Manager (OpsMgr) 2012 R2. In this particular case I will create a rule that keeps an eye on the Windows Special Logon events. The procedure is as follows:

Open the Operations Manager console -> Authoring -> Management Pack Objects. Right click on Rules -> Create a new rule. Open the Alert Generating Rules -> Event Based and select NT Event Log (Alert) (Figure 1).

Figure 1. Create Rule Wizard, Rule Type.

Select also the proper destination Management Pack (Figure 1) and click Next.

In the General window fill out the name of the rule. Optionally a description can be given as presented in Figure 2.

Select Alert as the Rule Category (Figure 2).

The Rule Target must be Windows Computer (Figure 2).

Make sure to uncheck the box Rule is enabled and click Next (Figure 2).

Figure 2. Create Rule Wizard, General.

Select the security event log and click Next (Figure 3).

Figure 3. Create Rule Wizard, Event Log Type.

In the build event Expression window fill out Event ID as the Parameter Name, Equals as the Operator choose a Value of 4672 and click Next (Figure 4).


Figure 4. Create Rule Wizard, Build Event Expression.

Fill out the Alert name and Alert description. Subsequently, select the priority and severity. In this case I chose to put the severity on the Information level. Next, click on Create (Figure 5). Optionally, custom alert fields can be added to the Alert description. Moreover, it is possible to make use of alert suppression.

Figure 5. Create Rule Wizard, Configure Alerts.


When the rule is created, search for it in the Look for box and open the rule properties (Figure 6).

Figure 6. Search rules.


In the rule properties window select the Overrides tab and select Override… For a group… (Figure 7).


Figure 7. Override for a group window.

Search and select the proper group and click OK.

*Make sure that the selected group is located in the same management pack as the rule. An alternative is to make use of a group that is located in a sealed management pack.

In the Override-controlled parameters check Enabled and make sure that the Override Value is set on True (Figure 8).

Figure 8. Override Properties window.

Figure 9 shows the alert properties in case an account with special logon has been reported. If desired it is possible to create a dedicated alert view to collect all the alerts (Figure 10).


Figure 9. Alert properties, special logon event.


Figure 10. Alert view, special logon events.

Good luck when practicing this kind of cool stuff in your own lab environment.

Installing OpsMgr 2012 R2 Reporting Services

Last week I was working for one of our clients. Although they have been using Operations Manager (OpsMgr) 2012 R2 for some time, they have not made use of OpsMgr SQL Reporting Services (SRS) yet. My job was to install and configure both SRS and OpsMgr Reporting. In this post I will describe the installation and configuration of SRS in an existing SQL environment as well as for OpsMgr 2012R2.

If one is going to install OpsMgr Reporting in an existing SRS environment beware of the fact that the OpsMgr Reporting installation overwrites the existing Reporting Databases.

Installing SQL Reporting Services

First install reporting services by adding this feature to the SQL installation. This can be done as follows:

  1. Open Control Panel -> Programs -> Programs and Features. Select the SQL installation, in my case Microsoft SQL Server 2008 R2 (x64).
  2. Click on Uninstall/Change -> Add and select the SQL installation media.
  3. Install the support Files and click install.
  4. Next select Add Features to an existing instance of SQL Server 2008 R2.
  5. In the Select Feature installation check Reporting Services.
  6. Verify the disk space and click next.
  7. Click next in the Error Reporting window.
  8. Click next in the rule check window.
  9. In the Ready to install window click on Install to start the installation.
  10. Verify in the Microsoft SQL Server Management Studio if the Report Server and Report ServerTempDB have been created.

After the setup has been completed SRS needs to be configured as described below.

Configuring SQL Reporting Services

Open the Reporting Services Configuration Manager. Select the Web Service URL and click on apply as presented in Figure 1.

Figure 1. Reporting Services Configuration Manager, Web Service URL.

Next select Database, and click on Change database (Figure 2).

Figure 2. Reporting Services Configuration Manager, Report Server Database.

In the Report Server Database Configuration Wizard window, select Create a new report server database (Figure 3).


Figure 3. Report Server Database Configuration wizard, create a new report server database.

In the Database Server window, select the database server and make sure that the Authentication Type is correct (Figure 4) click Next.

Figure 4. Report Server Database Configuration wizard, connect to the database server.

In the Database window, fill out the Database Name, check the language, select the proper Report Server Mode (Figure 5) and click Next.

Figure 5. Report Server Database Configuration wizard, enter database name.

In the Credentials window, select the authentication type, fill out the user Name and Password (Figure 6) and click Next.

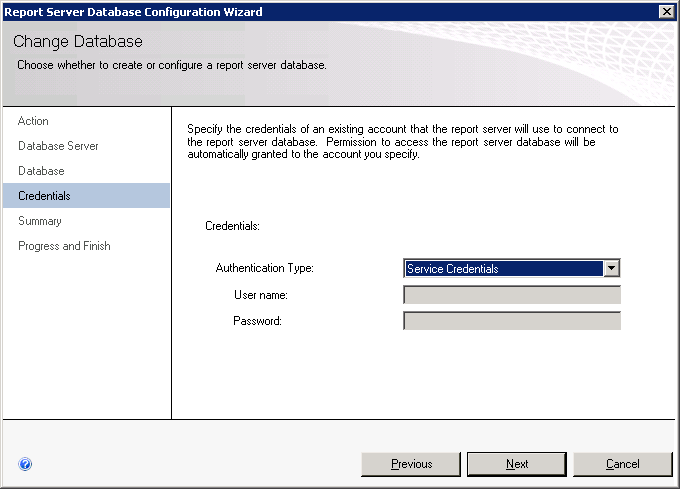
Figure 6. Report Server Database Configuration wizard, specify credentials.

Verify the configuration (Figure 7) and click Next.

Figure 7. Report Server Database Configuration wizard, summary.

In the Program and Finish window make sure that all items listed in Figure 8 are marked successful click Finish.

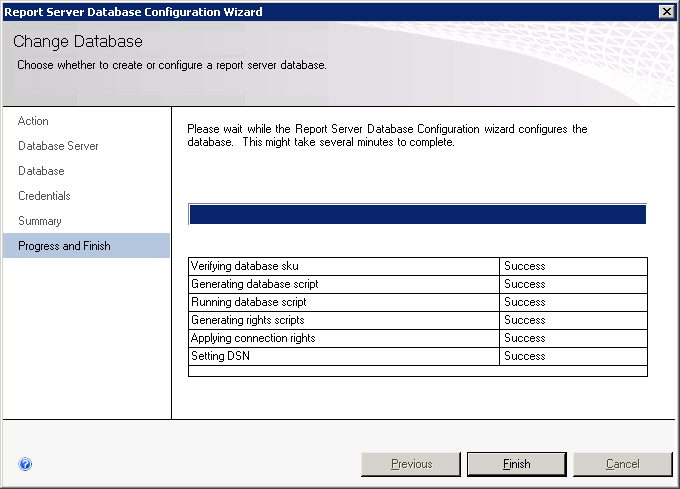
Figure 8. Report Server Database Configuration wizard.

Select the Report Manager URL window and click Apply (Figure 9).

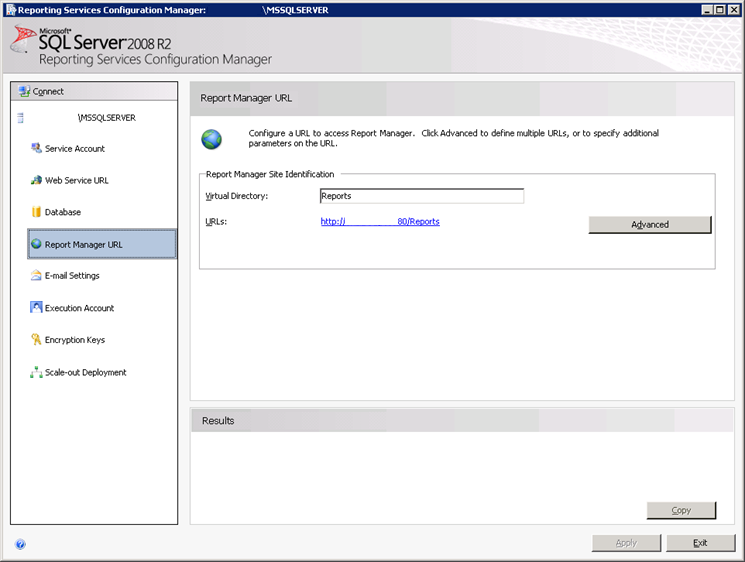
Figure 9. Reporting Services Configuration Manager, Report Manager URL.

At this moment, the SQL Reporting installation has been completed. Now we can start the OpsMgr2012 R2 SQL Reporting installation.

Installing Operations Manager Reporting Services

In order to install OpsMgr SRS, first start the OpsMgr 2012R2 installation wizard. Select only the Reporting Server, then click Next (Figure 10).

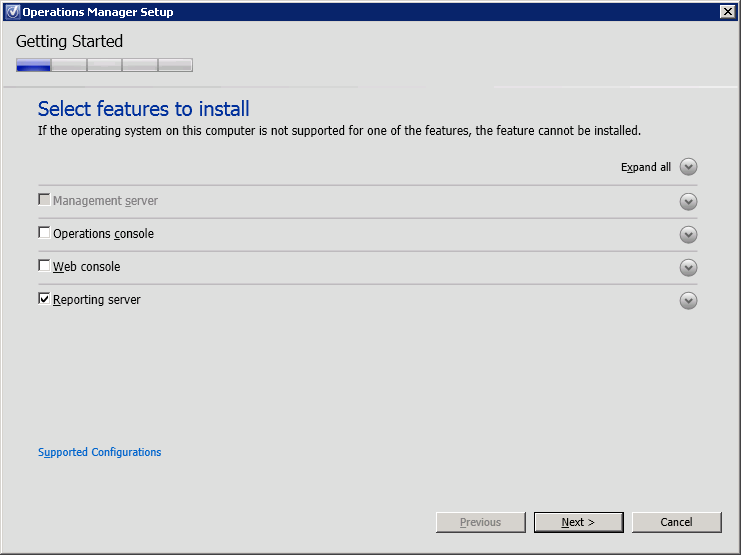
Figure 10. Operations Manager Setup, select features to install.

Subsequently, choose the correct installation directory (Figure 11) and click Next.

Figure 11. Operations Manager Setup, choose installation path.

If all the prerequisites passed as shown in Figure 12 click Next.

Figure 12. Operations Manager Setup, prerequisites check.

Select I have read, understood, and agree with the license terms (Figure 13).

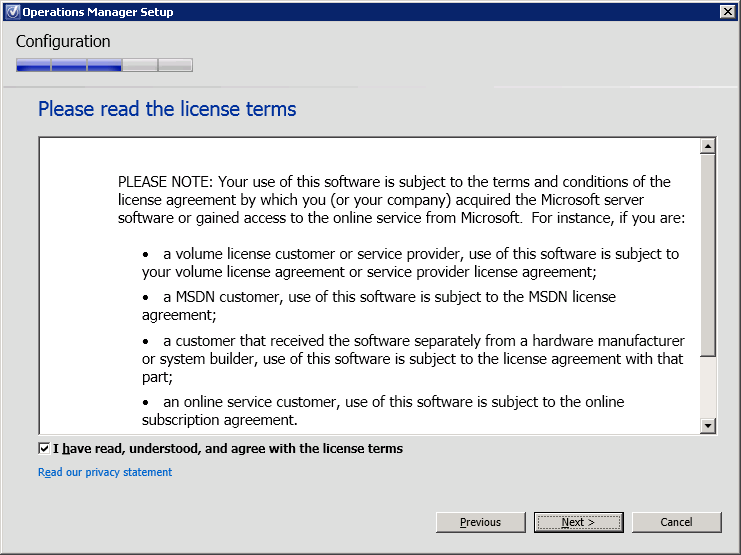
Figure 13. Operations Manager Setup, license terms.

Specify the OpsMgr management server (Figure 14).

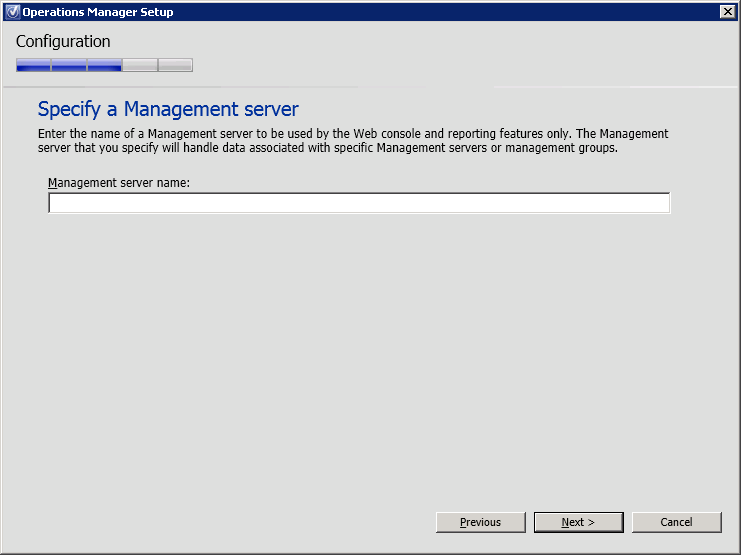
Figure 14. Operations Manager Setup, specify a management server.

Next, select the SQL Server instance for reporting services as demonstrated in Figure 15 and click Next.

*In the present case the Setup Wizard indicated the following message “The installed version of SQL Server could not be verified or is not supported”. Because this message can have several causes, it is wise to search the log file of the installation to further investigate the message. The OpsMgrSetupWizard log file is located in %:\Users\<USERNAME>\AppData\Local\SCOM\LOGS

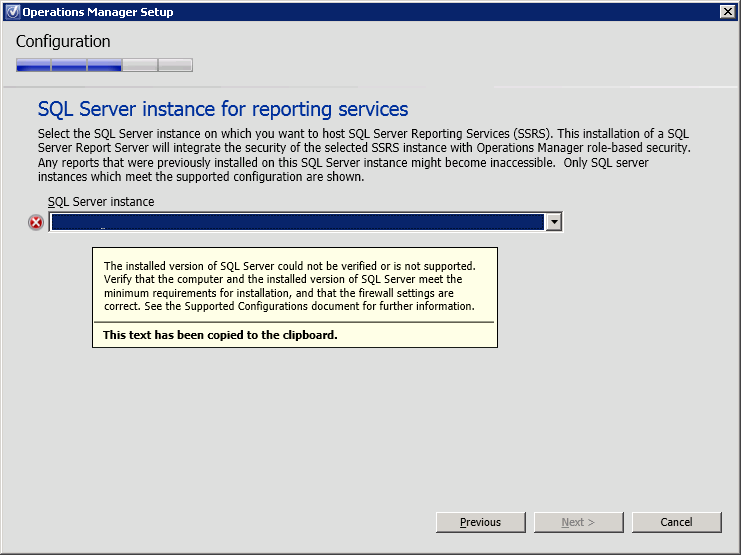
Figure 15. Operations Manager Setup, SQL Server instance for reporting services.

In the present case,  the log file revealed that the SRS version is different compared to the SQL version (Figure 16).

Figure 16. Operations Manager setup log file.

In fact, the log file indicates that SRS has version 10.50.1600.1. When running the SELECT @@VERSION query it appears that the SQL Database has version 10.50.2500.0 as shown in Figure 17. Moreover, Figure 17 reveals that SP1 is installed on the SQL Server. For this reason SP1 also needs to be installed for SRS. Once this has been completed, the OpsMgr reporting installation can be continued.

Figure 17. SQL Server Management Studio.

Proceed the installation by clicking Next (Figure 18).

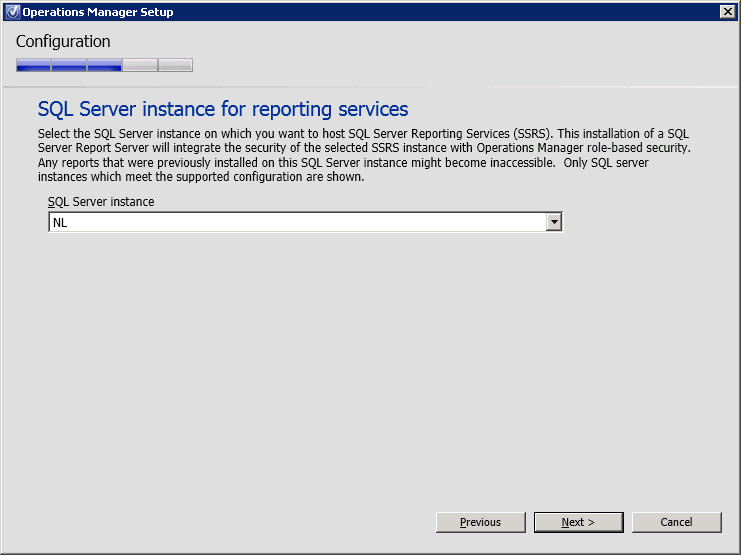
Figure 18. Operations Manager Setup, SQL Server instance for reporting services.

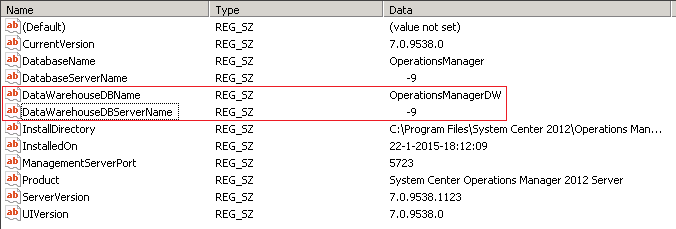
Configure the OpsMgr Data Reader account. This account will be used to deploy reports and needs to be able to run queries against the data warehouse (DWH). In addition, the account will also be used to connect to the Management Server (MS).  To continue click Next (Figure 19).

*The specified Data Reader account must have db_datareader rights on the OperationsMangerDW database.

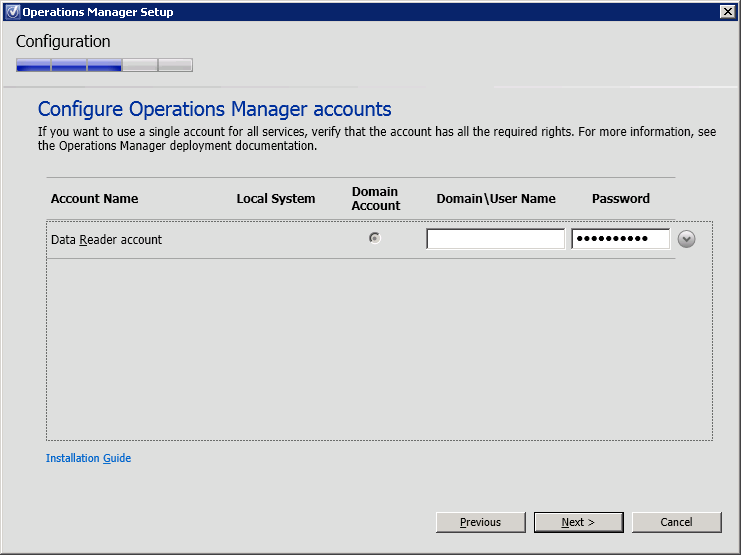
Figure 19. Operations Manager Setup, Configure Operations Manager accounts.

In the customer experience improvement program window select if you are willing to participate in the improvement program or not and click Next (Figure 20).

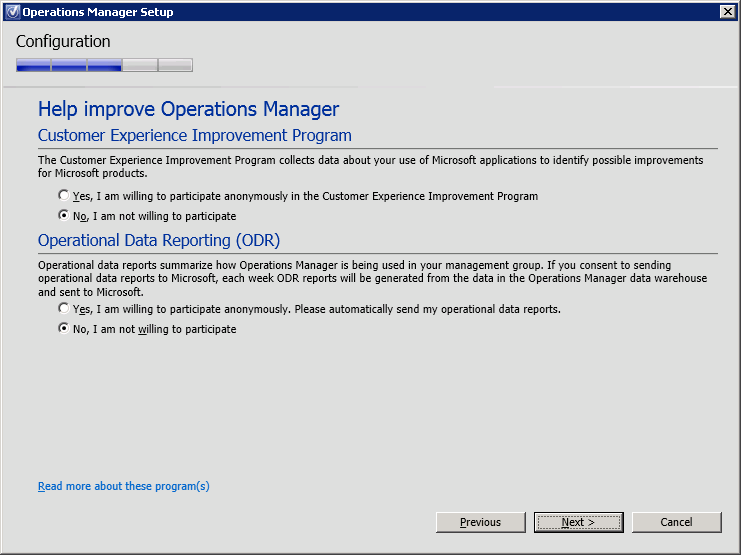
Figure 20. Operations Manager Setup, help improve Operations Manager.

Turn Microsoft update on or off and click on Next (Figure 21).

Figure 21. Operations Manager Setup, Microsoft Update.

Check the installation summary and click Install (Figure 22).

Figure 22. Operations Manager Setup, installation summary.

Make sure the installation has been successfully finished as shown in Figure 23.

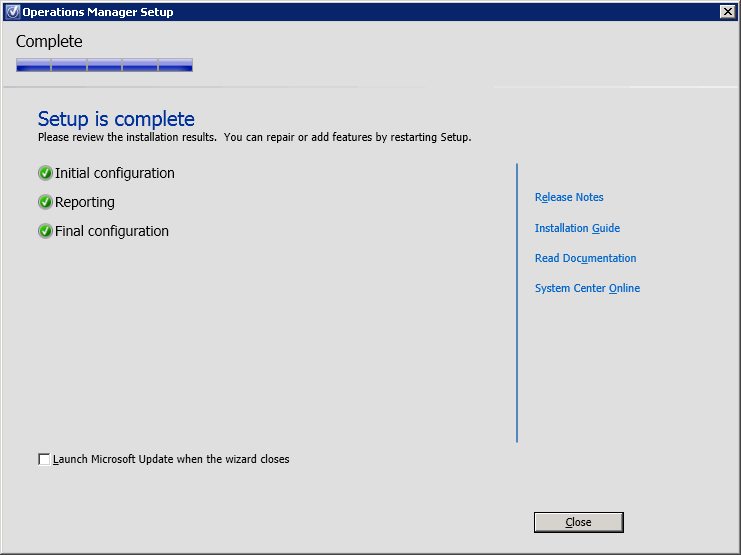
Figure 23. Operations Manager Setup, setup is complete.

*It can take a while before all the reports are shown in the console.

Next, open the OpsMgr console and select the Reporting Pane. A list of available reports is presented here (Figure 24).

Figure 24. Operations Manager Console, reporting pane.

It is now possible to create many different reports within the OpsMgr2012 R2 console or by connecting to the Reporting Services URL. Have fun and create some awesome reports 🙂