Introduction
In my previous blogpost I described how to configure a Site-to-site Virtual Private Network (VPN) connection in Microsoft Azure. In this blogpost I will explain how to create an Active Directory (AD) trust. This particular trust will create the possibility for users in the external domain (on-premises) to authenticate in the Azure domain. This means an External One-way: outgoing trust should be created.
Step 1. Create a conditional forwarder.
A conditional forwarder is a setting on a DNS server in the network that will forward data traffic to other DNS servers outside their own network. The current example described the authentication of users from a local AD in Azure AD. For more information about forwarders, please visit https://technet.microsoft.com/en-us/library/cc730756(v=ws.11).aspx
To create a conditional forwarder first open the DNS Manager on a Windows Server Domain Controller and right-click on the Conditional Forwarders container and select “New Conditional Forwarder” as shown in Figure 1.

Figure 1. DNS Manager.
In the “New Conditional Forwarder” window enter the DNS name of the server to which the traffic has to be forward.
Next, add the IP addresses of all servers which can resolve queries for this domain.
Optionally, it is possible to check the “Store this conditional forwarder in Active Directory, and replicate it as follows”. This will store the conditional forward configuration in AD and replicates it to all the Domain Controllers that have the DNS server role installed, please see Figure 2.

Figure 2. New Conditional Forwarder configuration.
Now click “OK” and the forwarder is saved (Figure 3).
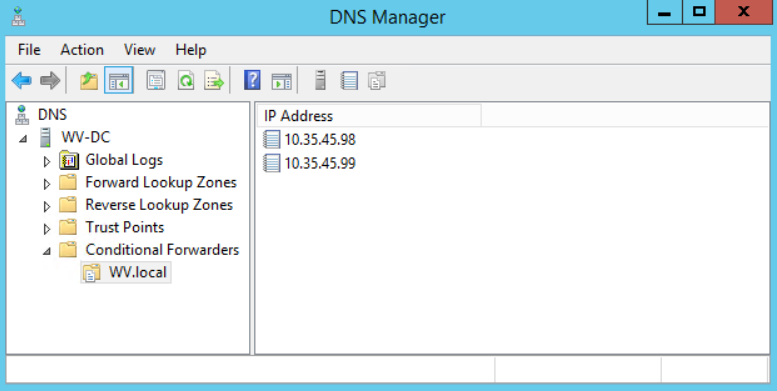
Figure 3. New Conditional Forwarder.
Step 2. Flush DNS cache.
In order to resolve the new DNS domain, the cache needs to be cleared. Open a “command prompt” with administrator privileges and type “ipconfig /flushdns” as presented in Figure 4.
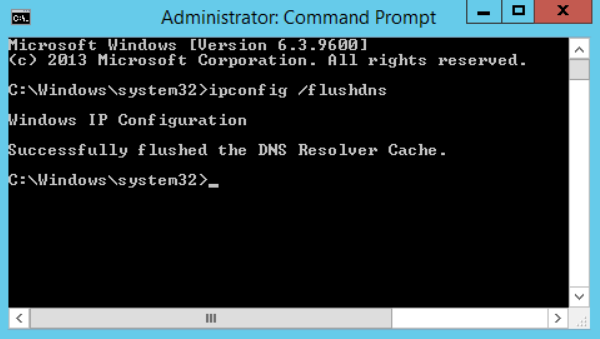
Figure 4. Flush DNS command in an elevated command prompt.
Once the DNS cache has been cleared the domain can be resolved.
Step 2. Create the AD trust.
Open “Active Directory Domain and Trusts” and right-click on the domain in order to open the properties. Next, select the tab “Trusts” and click “New Trust…” (Figure 5).

Figure 5. Domain properties.
The New Trust Wizard will open (Figure 6) and click “Next”.

Figure 6. Start window with the New Trust Wizard.
Subsequently, type the name of the domain and click “Next” (Figure 7). Note that this name should refer to the trust at which it has to be establish.

Figure 7. Type in the Trust Name.
In the next step the trust type of interest should be selected. In the current example the trust has to be established from the local domain to the Azure domain, so therefore an “Forest trust” was used as shown in Figure 8. To complete the selection of the trust type, click “Next”

Figure 8. Select the trust type.
After selecting the trust type, select the direction of the trust type. In the current example the “Two-way” trust is the best suitable selection for the goal (authenticate in the Azure domain). Please see Figure 9 for details. To finish selecting the direction for the trust and click “Next”.

Figure 9. Select the direction of trust.
The trust can be created for “This domain only” which is relevant for the current example since it is not necessary to have privileges in both domains (see Figure 10). Select the preferred option and click “Next”.
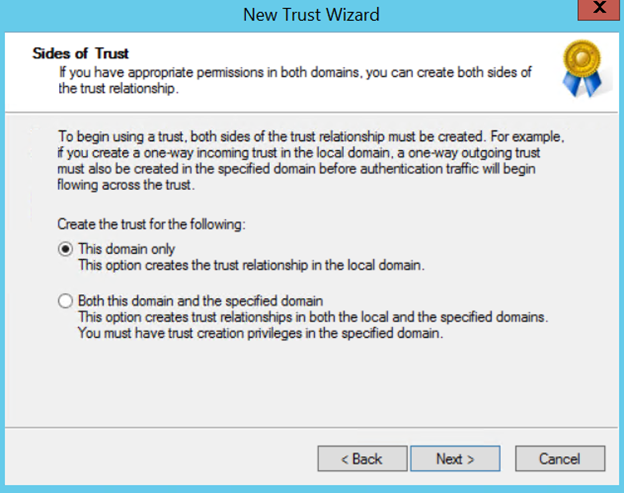
Figure 10. Select the side of trust.
The outgoing trust level will be set to “Forest-wide authentication”. This ensures that users automatically authenticate from the specified domain in the local domain (Figure 11). After the level of authentication is selected click “Next”.

Figure 11. Define the trust authentication level.
Once the outgoing trust level is set, type in the trust password (Figure 12). Make sure it is secure enough and it meets the domain security policy. A combination of symbols, numbers, and uppercase and lowercase letters are allowed. Confirm the password and click “Next”.
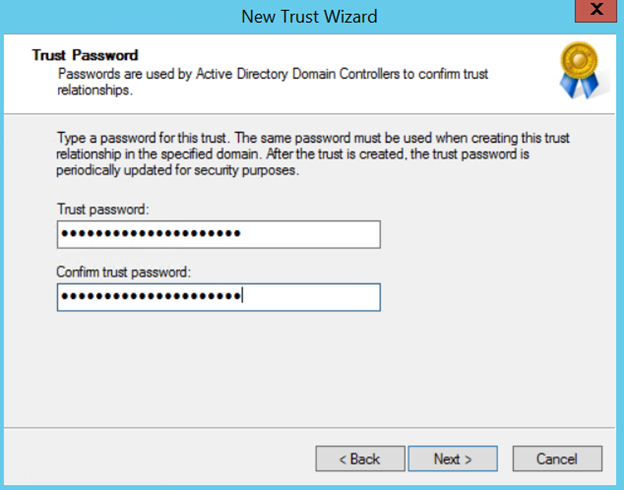
Figure 12. Trust password window.
Figure 13 provides a summary of the settings for the trust. To create the trust, click “Next” to continue.
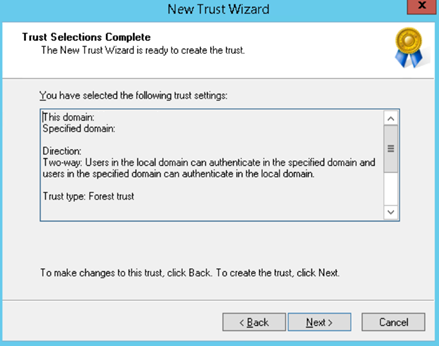
Figure 13. Summary of the trust wizard settings.
If everything went well the trust relationship has been created (Figure 14). Click “Next”.
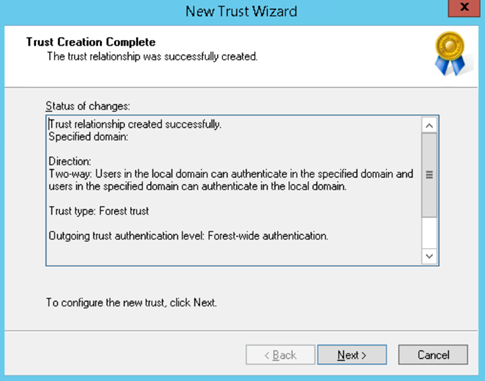
Figure 14. Status of the created trust.
In the “confirm outgoing trust” window it is possible to confirm the outgoing trust. To do so select “Yes, confirm the outgoing trust” and click “Next”. Please see Figure 15 for details. Be sure to confirm the trust only if the trust on the other domain is already created.

Figure 15. Option to confirm the outgoing trust.
In the “confirm Incoming trust” window it is possible to confirm the incoming trust. Select “No, do not confirm the incoming trust” and click “Next” (Figure 16).
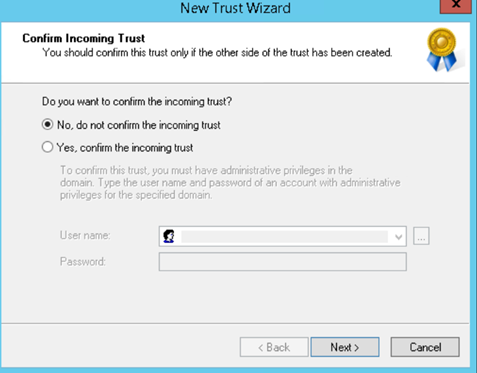
Figure 16. Option to confirm the incoming trust.
The final step in the wizard shows that the trust relationship was successfully created and confirmed as shown in Figure 17. Click “Finish” to end the configuration.

Figure 17. Complete new trust wizard.
The bridge has been built, now it’s time to let cars drive over it!
